Hello! We’ve noticed that you haven’t made any recent edits on your wiki this year. This is a notice that your wiki is eligible for removal. Click here to learn more about the criteria for wiki removal.
You're nearly done with the UCC tutorial, you've finished setting UCC up using the .ini files and familiarized yourself with it's folders and their uses.
Now it's time to take a look at how to use UCC once you run it using the Converter.exe file.
Let's begin with the UCC visual guide...
Using UCC - Visual Step-by-Step Guide
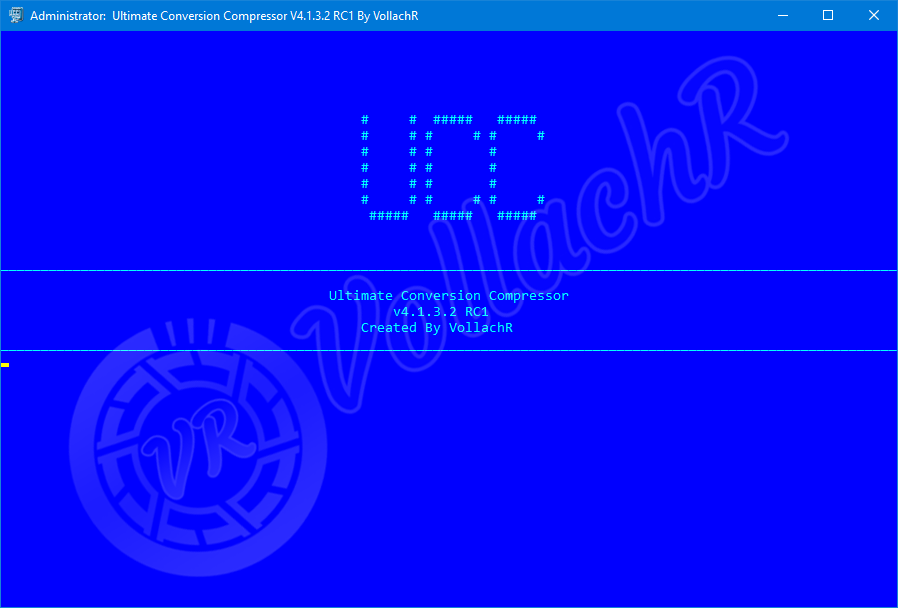
Start Converter.exe, after a couple of seconds you will be greeted by the new UCC "Splash" screen.
Figure 1: The UCC Splash Scrren
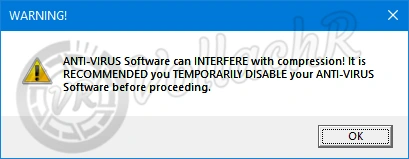
A few seconds after that you will see a message pop-up, this message warns you that anti-virus software may sometime interfere with the compression process.
Figure 2: The AV Warning Messge
The message will disappear after 10 seconds or you can press OK to close it and continue.
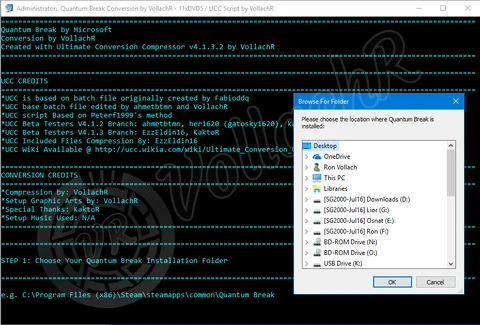
This will bring you the to first screen of UCC, on the screen you will see all the relevant information about the conversion you are making, UCC will now ask you to select the location where the game is installed.
Figure 3: Game Folder Selection
At this point if you press the Cancel button you will be asked if you wish to use the default game folder as defined by the UCC Settings.ini file
Figure 4: Do you wish to use the default game folder?
Please Note: Unlike in Figure 4, in the final version of UCC v4.1.3.2 the default folder path will be shown.
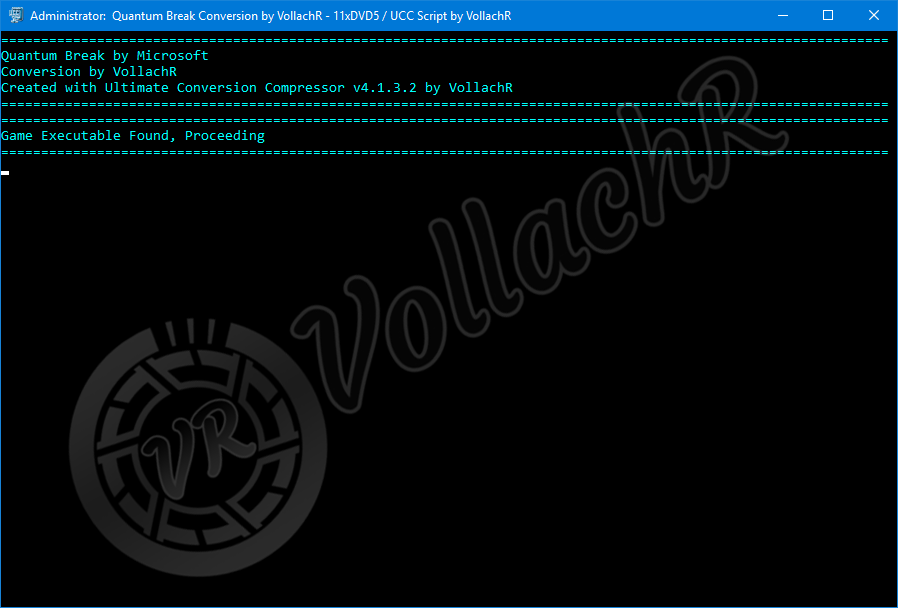
Once the game folder is selected, if UCC finds the game executable in the selected folder it will show the "Game Executable Found" message as seen below
Figure 5: Game Exe Found
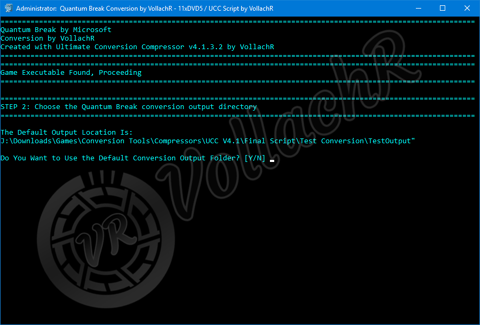
After the game folder have been set UCC will continue and ask you if you want to use the default conversion output folder or choose a custom output folder of your own, UCC will show you the current default folder path as shown in Figure 6.
Figure 6: Choose between default or custom output folders
At this point, if you choose to select a custom folder a folder selection dialogue window will open
Figure 7: Selecting a custom output folder
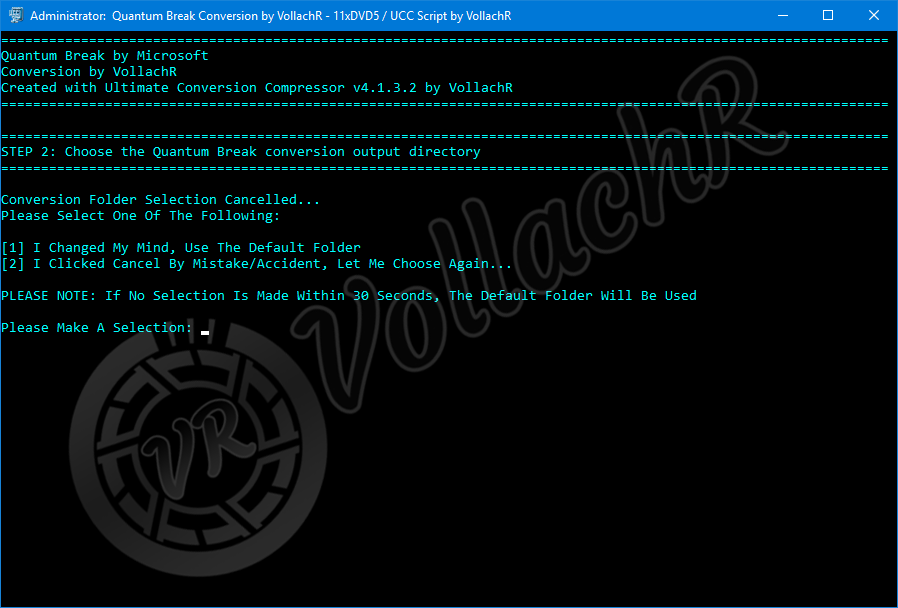
This will allow you to select any folder on your computer as an output location, as well as creating a new folder, once done you can press OK to confirm your selection and continue, if you press Cancel, either by intention to mistake, UCC will display the following selection:
Figure 8: Output Selection Cancelled
Just like it says in the UCC console, you have 30 seconds to perform a selection, after 30 seconds UCC will continue and will opt to use the default folder location.
Once the output selection is completed UCC will ask you a few more questions to defined what to do after the conversion is ready.
First up, UCC will ask what do you wish to do and everything else is finished, you can choose to either exit UCC, Reboot or Shutdown your computer.
Figure 9: Choosing the End Action
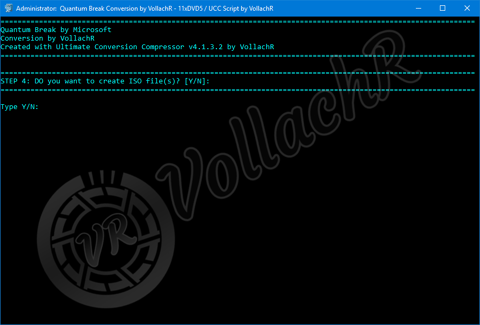
Once you made your selection UCC will ask if you wish to create ISO files when the conversion is ready
Figure 10: ISO Creation Prompt
At this point, if you answer yes UCC will show you the default location for the ISO files and ask if you wish to select a different location, if you answer yes again UCC will show you another folder selection dialogue window
Figure 11: Selection ISO Location
If you click Cancel at this point UCC will use the default location for the ISO files.
If the option MoveRedist and all it's sub-options was set-up correctly in the Settings.ini file UCC will now move the redist folder out of the game directory
Figure 12: Moving Redist
The next part depends of the type of splitting that was defined in the Settings.ini file if at all, for the purpose of this guide I'll assume splitting is required but for the archive and not game files, in that case, UCC will now begin compressing the game files.
Figure 13: Compressing Files
Please Note: If you decided to split game files rather than the data archive UCC will start the splitting operation instead.
Once UCC finished creating the archive it will inform you about it on the screen, at which point it will either continue to the next archive if there is any or tell you the compression is completed.
Figure 14: Data File Ready
Figure 15: Compression Completed
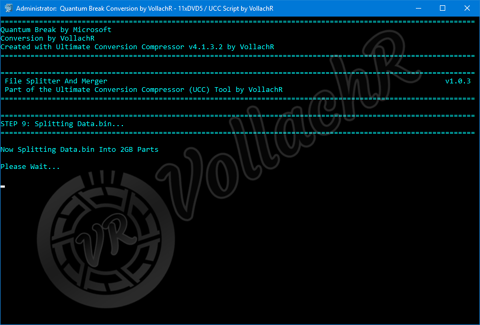
At this point, if UCC was set to split the created archive, it will notify you that file splitting is needed then start the UCC splitter and begin the splitting operation:
Figure 16: Splitting is Required
Figure 17: UCC Splitting the file
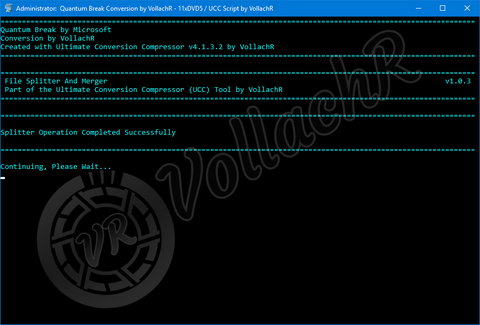
If by any chance the file size for the split wasn't set in the Settings.ini UCC will display a menu to allow the user to select the desired size, for now we'll assume it was set correctly, after a while, depends on the split size and size of the original file the splitting operation will be completed and UCC will tell you just that.
Figure 18: Splitting Operation Completed
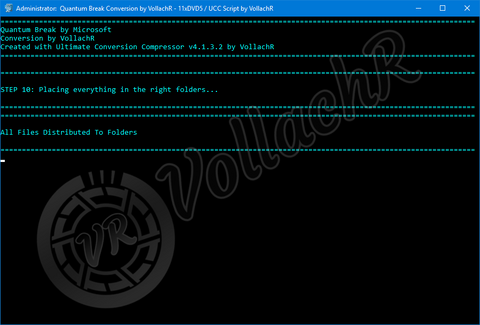
UCC will now begin to distribute the various files into the correct folders, files like Setup.exe, Setup.ini, the Redist and any other files you may added in the [Misc] folder.
Figure 19: UCC Distributing Files
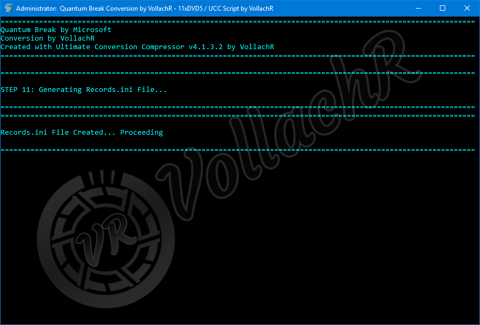
Now, if the splitter function was used to split the compressed data file, UCC will generate the required Records.ini file for use with CIUv2
Figure 20: Generating Records.ini
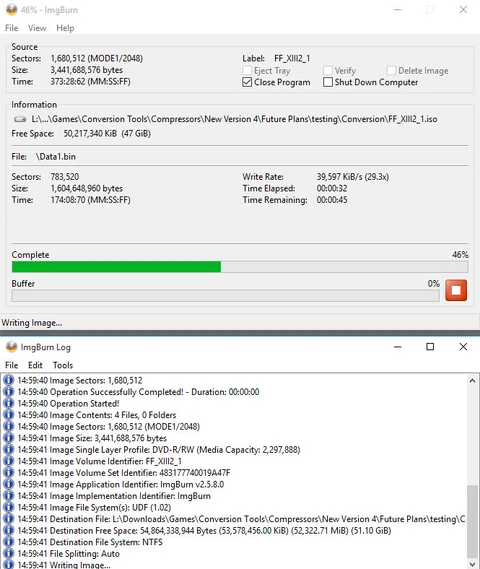
You're almost done, the conversion is completed, if you chose to create ISO files UCC will display the location where they will be created and then start ImgBurn to create the ISO files.
Figure 21: Starting ISO Creation
Figure 22: ImgBurn Creating the ISO Files
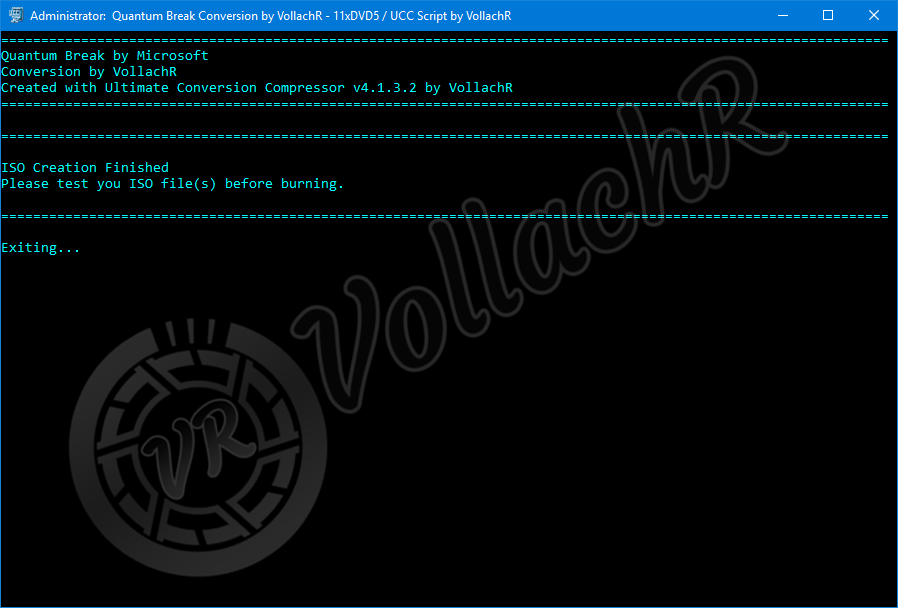
Once ImgBurn finished creating all the relevant ISO files for each of the discs in the conversion UCC will display the "Conversion Complete" message
Figure 23: Conversion Completed
Please Note: The message shown in Figure 22 is different than the one in the final v4.1.3.2 of UCC, it will also change according to your selections when UCC ask you what to do at the end and if you want to create ISO files.
After a few seconds UCC will display a message similar to the "Splash" screen that it started with that will thank you for using UCC, at which point UCC will perform the action chosen at the beginning and will either Exit/Reboot/Shutdown.
That's it, you're all done.
Enjoy Using the Ultimate Conversion Compressor (UCC)


")
")